
End to End sample workflow for Token Classification starting with training in TAO Toolkit and deployment using Riva.
TAO - Named Entity Recognition
Train Adapt Optimize (TAO) Toolkit is a python based AI toolkit for taking purpose-built pre-trained AI models and customizing them with your own data.
Transfer learning extracts learned features from an existing neural network to a new one. Transfer learning is often used when creating a large training dataset is not feasible.
Developers, researchers and software partners building intelligent vision AI apps and services, can bring their own data to fine-tune pre-trained models instead of going through the hassle of training from scratch.
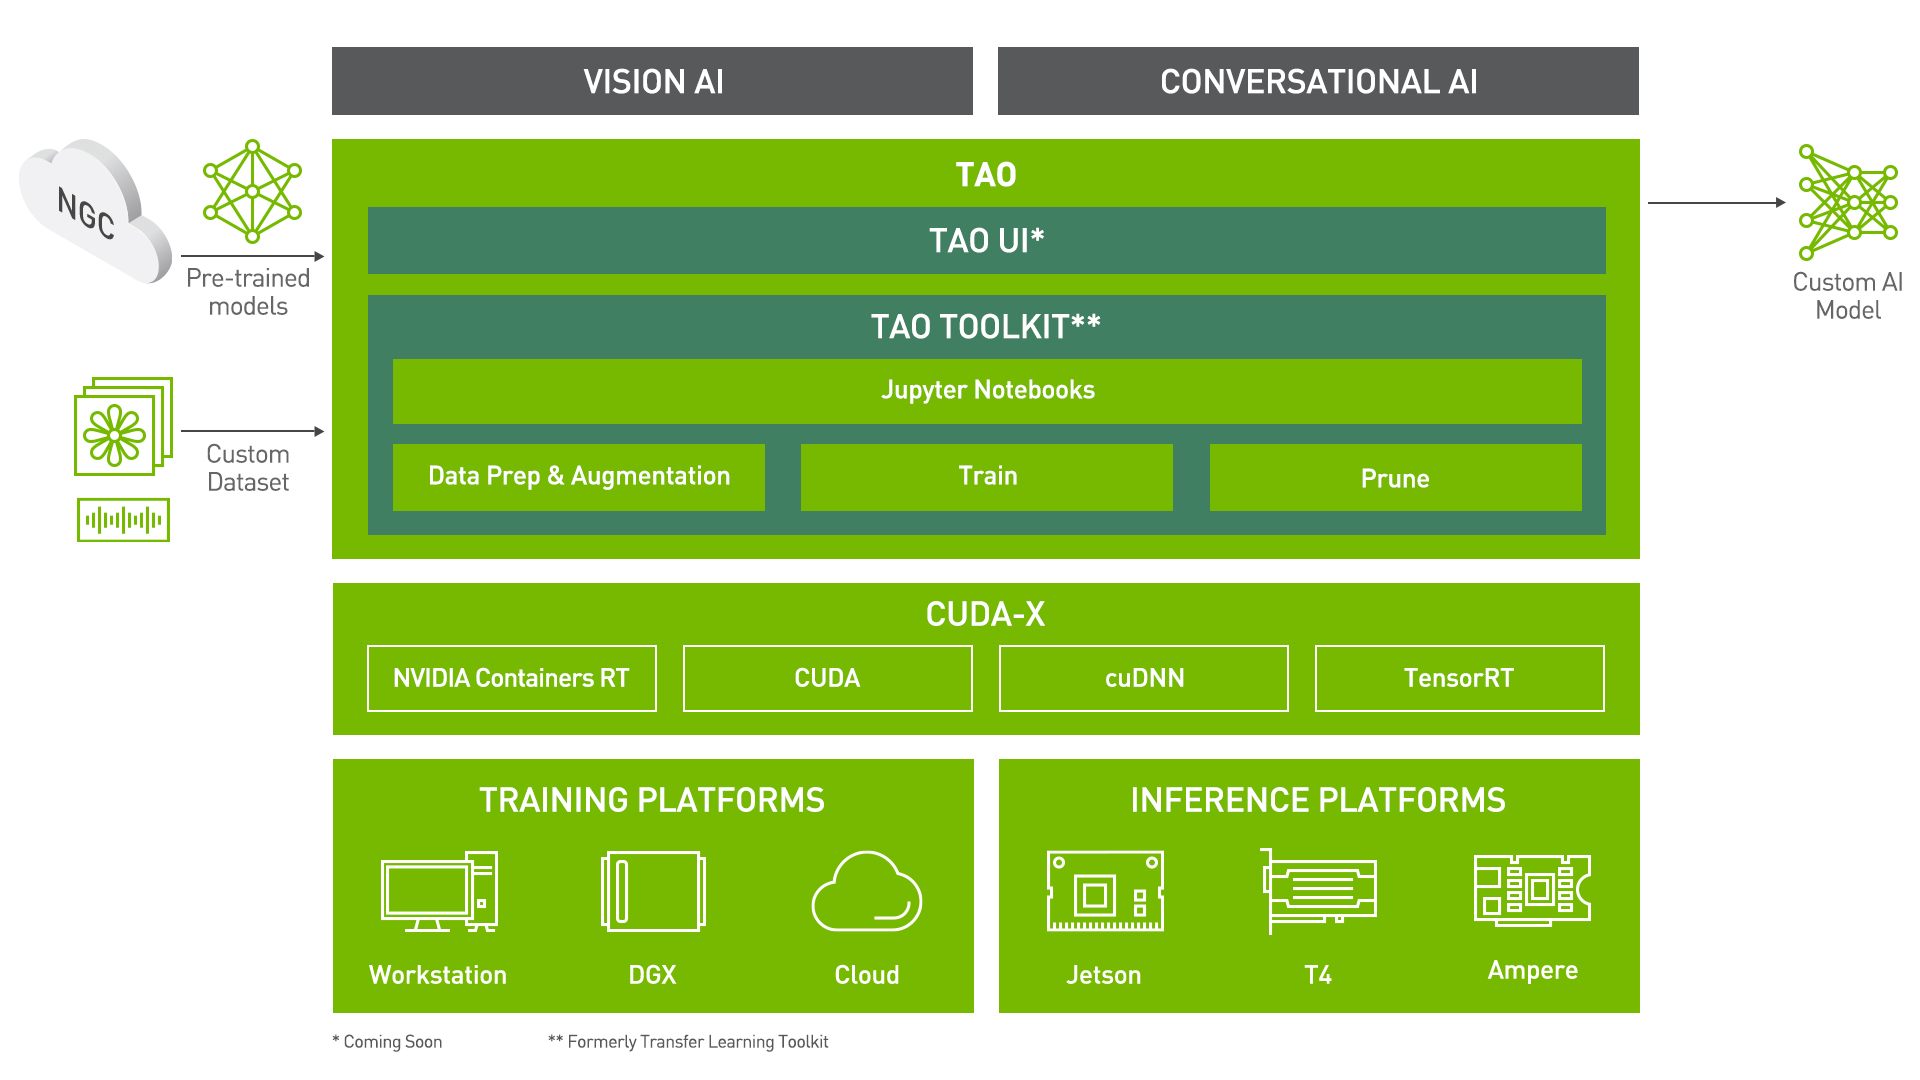
The goal of this toolkit is to reduce that 80 hour workload to an 8 hour workload, which can enable data scientist to have considerably more train-test iterations in the same time frame.
Let's see this in action with a use case for Named Entity Recognition.
Named Entity Recognition
Named entity recognition (NER), also referred to as entity chunking, identification or extraction, is the task of detecting and classifying key information (entities) in text.
For example, in a sentence: Mary lives in Santa Clara and works at NVIDIA, we should detect that Mary is a person, Santa Clara is a location and NVIDIA is a company.
Named Entity Recognition using TAO
Installing and setting up TAO
For ease of use, please install TAO inside a python virtual environment. Simple steps to install virtualenv are given here.
We recommend performing this step first and then launching the notebook from the virtual environment. In addition to installing TAO python package, please make sure of the following software requirements:
- python 3.6.9
- docker-ce > 19.03.5
- docker-API 1.40
- nvidia-container-toolkit > 1.3.0-1
- nvidia-container-runtime > 3.4.0-1
- nvidia-docker2 > 2.5.0-1
- nvidia-driver >= 455.23
Let's install TAO. It is a simple pip install!
Dataset Details
In this tutorial we going to use GMB(Groningen Meaning Bank) corpus for entity recognition.
GMB is a fairly large corpus with a lot of annotations. Note, that GMB is not completely human annotated and it’s not considered 100% correct.
The data is labeled using the [IOB format](https://en.wikipedia.org/wiki/Inside%E2%80%93outside%E2%80%93beginning_(tagging) (short for inside, outside, beginning).
The following classes appear in the dataset:
- LOC = Geographical Entity
- ORG = Organization
- PER = Person
- GPE = Geopolitical Entity
- TIME = Time indicator
- ART = Artifact
- EVE = Event
- NAT = Natural Phenomenon
For this tutorial, classes ART, EVE, and NAT were combined into a MISC class due to small number of examples for these classes.
Download Data
Now, the data folder should contain 5 files:
- labels_dev.txt
- labels_train.txt
- text_dev.txt
- text_train.txt
- label_ids.csv
Set Relevant Paths
Once TAO is installed, the next step is to setup the mounts.
The file ~/.tao_mounts.json takes care of the mounts inside docker container and also for additional arguments to be passed to docker run command. This file is stored in the users home directory.
Let's overwrite ~/.tao_mounts.json with the mounts needed. Please change the paths to "source" key below.
After installing tao the next step is to setup the mounts for TAO. The TAO launcher uses docker containers under the hood, and for our data and results directory to be visible to the docker, they need to be mapped. The launcher can be configured using the config file ~/.tao_mounts.json. Apart from the mounts, you can also configure additional options like the Environment Variables and amount of Shared Memory available to the TAO launcher.
IMPORTANT NOTE: The code below creates a sample ~/.tao_mounts.json file. Here, we can map directories in which we save the data, specs, results and cache. You should configure it for your specific case such your these directories are correctly visible to the docker container. Please also ensure that the source directories exist on your machine!
The "source" and "destination" are mounts for the source and destination folders to access the pre-processed and processed dataset.
You can check the docker image versions and the tasks that tao can perform. You can also check this out with tao info --verbose
Now that everything is setup, we would like to take a bit of time to explain the tao interface for ease of use. The command structure can be broken down as follows: tao <task name> <subcommand>
Let's see this in further detail.
Downloading Specs
TAO's Conversational AI Toolkit works off of spec files which make it easy to edit hyperparameters on the fly. We can proceed to downloading the spec files. The user may choose to modify/rewrite these specs, or even individually override them through the launcher. You can download the default spec files by using the download_specs command.
The -o argument indicating the folder where the default specification files will be downloaded, and -r that instructs the script where to save the logs. Make sure the -o points to an empty folder!
Data pre-processing
TokenClassification Model in NeMo supports NER and other token level classification tasks, as long as the data follows the format specified below.
Token Classification Model requires the data to be split into 2 files:
- text.txt and
- labels.txt.
Each line of the text.txt file contains text sequences, where words are separated with spaces, i.e.: [WORD] [SPACE] [WORD] [SPACE] [WORD].
The labels.txt file contains corresponding labels for each word in text.txt, the labels are separated with spaces, i.e.: [LABEL] [SPACE] [LABEL] [SPACE] [LABEL].
Example of a text.txt file:
Jennifer is from New York City .
She likes ...
...
Corresponding labels.txt file:
B-PER O O B-LOC I-LOC I-LOC O
O O ...
...
To convert an IOB format data to the format required for training, we can use the dataset_convert command in TAO on your train and dev files
For this tutorial, we are using the preprocessed GMB dataset, thus we won't be required to convert the dataset.
Train the NER model from scratch using pre-trained BERT base uncased model
Our Named Entity Recognition model is comprised of the pretrained BERT model followed by a Token Classification layer.
The model is defined in a config file which are already available for you to use directly or as reference to create your own.
Through these spec files, the user can tune many knobs like the model, dataset, hyperparameters, optimizer etc. Each command (like train, finetune, evaluate etc.) should have a dedicated spec file. These sample spec files are available at $SPECS_DIR/token_classification
The important sections to look out for are:
- model: All arguments that are related to the model - language model, token classifier, optimizer and schedulers, datasets and any other related information
- trainer: Any argument to be passed to PyTorch Lightning
The model config file for token classification is available at Github. A similar file (at the above location inside TAO docker image) is used for TAO.
Among other things, the config file contains dictionaries called dataset, train_ds and validation_ds. These are configurations used to setup the Dataset and DataLoaders of the corresponding config.
We assume that both training and evaluation files are located in the same directory, and use the default names mentioned during the data download step. So, to start model training, we simply need to specify model.dataset.data_dir, like we are going to do below.
Also notice that some config lines, including model.dataset.data_dir have ??? in place of paths, which means that the values for these fields are required to be specified by the user.
Thus, we must provide the following parameters to TAO:
- data_dir - path to the processed data
- model.label_ids - mapping of labels with their numerical ids
We can pass these parameters while using the TAO train command. In addition to these, we can also change other parameters like max_epochs.
A similar version of model config file we saw above is also passed to the TAO train command.
Finetune NER model
When we were training from scratch, the datasets were prepared for training during the model initialization. When we are using a pretrained NER model, before training, we need to setup training and evaluation data, and also provide path to the pre-trained model.tlt
For simplicity of this tutorial, we will be using the trained-model.tlt that was saved during the last section (Train the NER model from scratch using pre-trained BERT Base uncased model) and finetune it again on the GMB dataset.
Note: If you wish to proceed with a trained dataset for better inference results, you can find a .nemo model here.
Simply re-name the .nemo file to .tlt and pass it through the finetune pipeline.
This command will generate a fine-tuned model finetuned-model.tlt at $RESULTS_DIR/finetune-bert-base/checkpoints
Evaluate NER on the Validation Set
To see how the model performs, we can generate prediction the same way we did it earlier or we can use our model to generate predictions for a dataset from a file, for example, to perform final evaluation or to do error analysis. Below, we are using a subset of dev set, but it could be any text file as long as it follows the data format described above.
labels_file is optional here, and if provided will be used to get metrics.
Using the below command, TAO will evaluate on text_dev.txt present in the data_dir, using trained-model.tlt model
Export model to ONNX format for deployment
Once the model is trained up-to satisfactory metrics, we can export it in ONNX format to be deployed with any inferencing solution.
This command exports the model as exported-model.eonnx which is essentially an archive containing the .onnx model.
If you're specifically interested to deploy this model using NVIDIA Riva, please set export_format=RIVA.
The model is exported as exported-model.riva which is in a format suited for deployment in Riva.
Infer on a custom input sentence
To get the model's predictions on a given sentence of your choice, you can save those sentences in infer.yaml and use TAO infer command.
The infer.yaml contains:
# Copyright (c) 2020, NVIDIA CORPORATION. All rights reserved.
# TAO Spec file for inference using the previously pretrained Token Classification model.

# "Simulate" user input: batch with two samples.
input_batch:
  - 'We bought four shirts from the Nvidia gear store in Santa Clara.'
  - 'Nvidia is a company.'
Please edit input_batch with your own sentences to measure the output of this NER model.
What's Next?
You could use TAO to build custom models for your own applications, or you could deploy the custom model to Nvidia Riva!