
End to End workflow for question answering starting with training in TAO Toolkit and deployment using Riva.
Question Answering using Train Adapt Optimize (TAO) Toolkit
Transfer learning is the process of transferring learned features from one application to another. It is a commonly used training technique where you use a model trained on one task and re-train to use it on a different task.
**Train Adapt Optimize (TAO) Toolkit ** is a simple and easy-to-use Python based AI toolkit for taking purpose-built AI models and customizing them with users' own data.
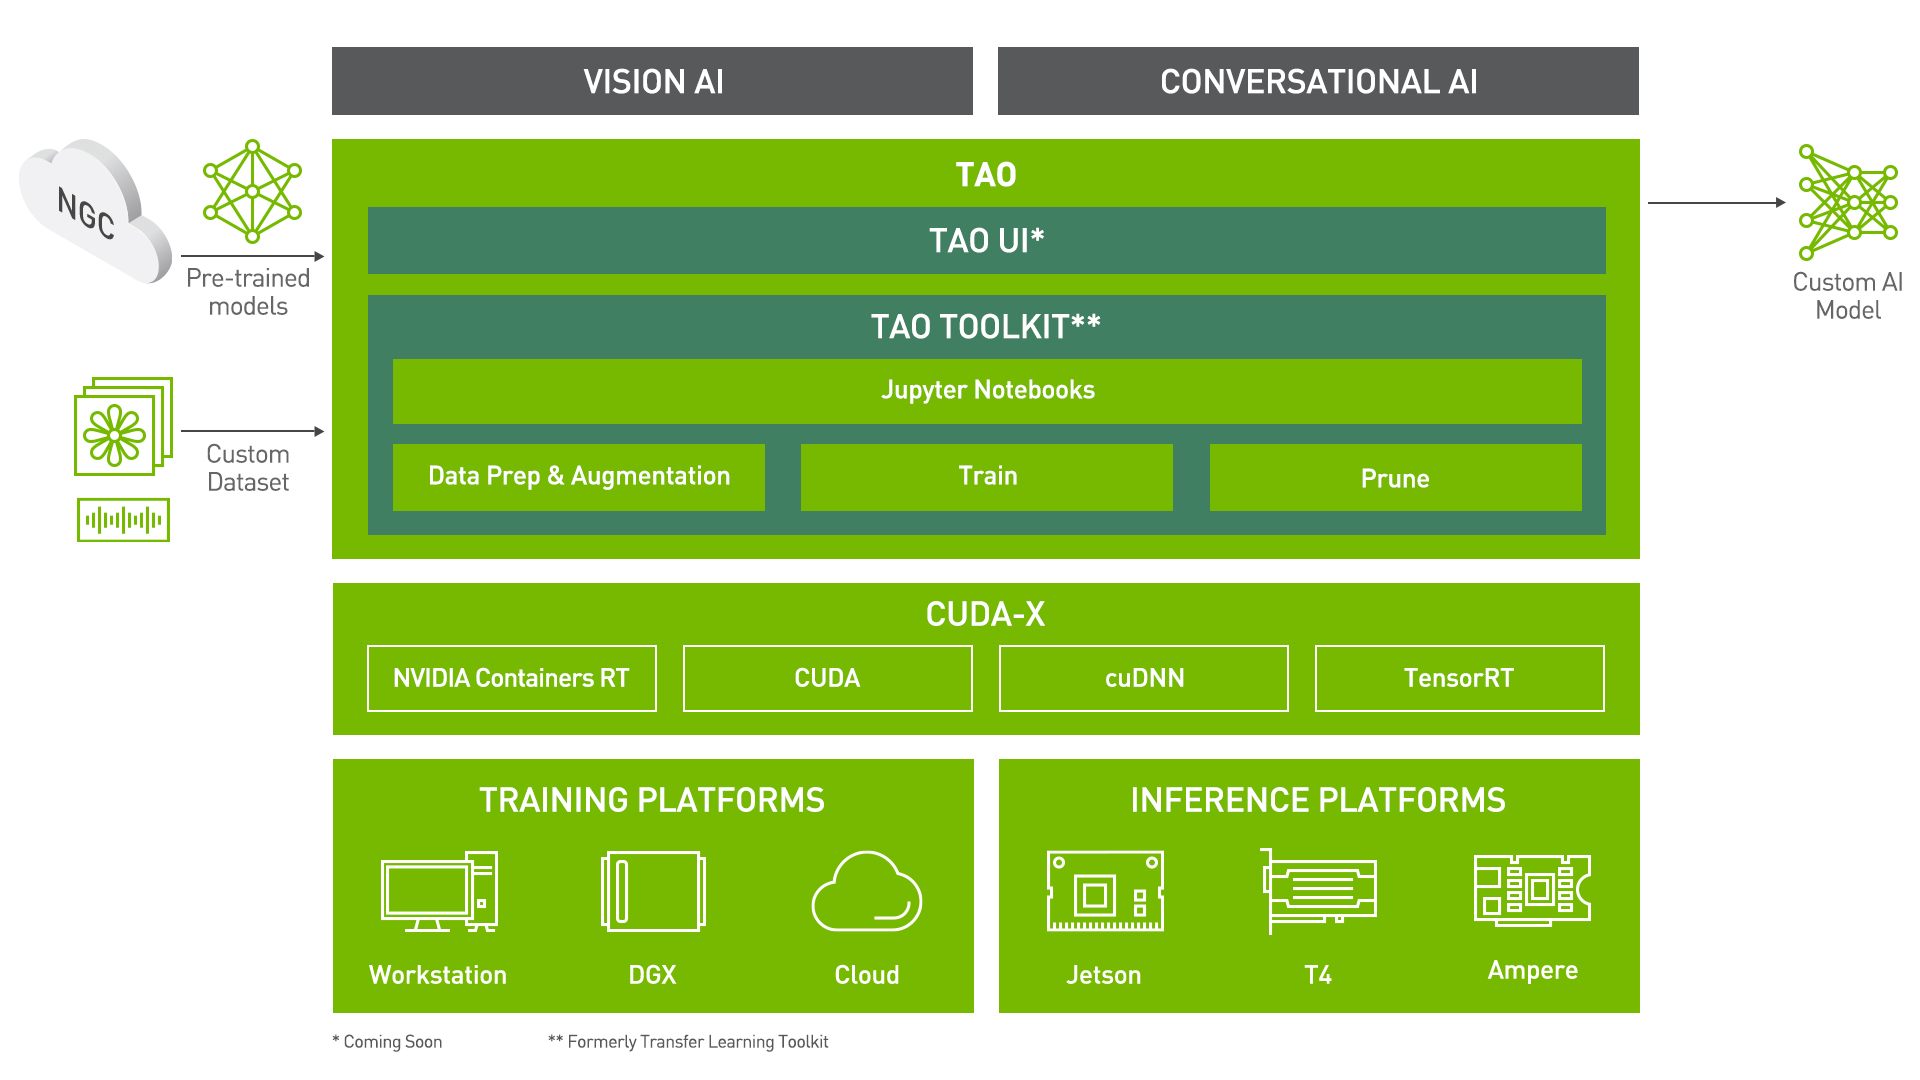 <\center>
Learning Objectives
In this notebook, you will learn how to leverage the simplicity and convenience of TAO to:
- Take a BERT QA model and Train/Finetune it on the SQuAD dataset
- Run Inference
- Export the model for the ONNX format, or export in a format suitable for deployment in Riva.
The earlier sections in the notebook give a brief introduction to the QA task, the SQuAD dataset and BERT. If you are already familiar with these, and want to jump right into the meat of the matter, you can start at section on Data Preparation.
Pre-requisites
For ease of use, please install TAO inside a python virtual environment. We recommend performing this step first and then launching the notebook from the virtual environment.
Let's install TAO. It is a simple pip install!
To see the docker image versions and the tasks that perform, use the tao info command.
In addition to installing TAO package, please make sure of the following software requirements:
- python 3.6.9
- docker-ce > 19.03.5
- docker-API 1.40
- nvidia-container-toolkit > 1.3.0-1
- nvidia-container-runtime > 3.4.0-1
- nvidia-docker2 > 2.5.0-1
- nvidia-driver >= 455.23
Check if the GPU device(s) is visible
Question Answering (QA)
Task Description
The Question Answering task in NLP pertains to building a model which can answer questions posed in natural language. Many datasets (including SQuAD, the dataset we use in this notebook) pose this as a reading comprehension task i.e. given a question and a context, the goal is to predict the span within the context with a start and end position which indicates the answer to the question. For every word in the training dataset we predict:
- likelihood this word is the start of the span
- likelihood this word is the end of the span
The SQuAD Dataset
SQuAD is a large dataset for QA consisting of reading passages obtained from high-quality Wikipedia articles. With each passage, the dataset contains accompanying reading comprehension questions based on the content of the passage. For each question, there are one or more answers. These questions and corresponding answers were obtained through crowdsourcing.
The SQuAD format consists of a JSON file for each dataset split. Each title has one or multiple paragraph entries, each consisting of the text - "context", and question-answer entries. Each question-answer entry has:
- a question
- a boolean flag "is_impossible" which shows if the question is answerable or not
- a globally unique id
- in case the question is answerable one answer entry, which contains the text span and its starting character index in the context. If not answerable, the "answers" list is empty
{
    "data": [
        {
            "title": "Super_Bowl_50",
            "paragraphs": [
                {
                    "context": "Super Bowl 50 was an American football game to determine the champion of the National Football League (NFL) for the 2015 season. The American Football Conference (AFC) champion Denver Broncos defeated the National Football Conference (NFC) champion Carolina Panthers 24\u201310 to earn their third Super Bowl title. The game was played on February 7, 2016, at Levi's Stadium in the San Francisco Bay Area at Santa Clara, California. As this was the 50th Super Bowl, the league emphasized the \"golden anniversary\" with various gold-themed initiatives, as well as temporarily suspending the tradition of naming each Super Bowl game with Roman numerals (under which the game would have been known as \"Super Bowl L\"), so that the logo could prominently feature the Arabic numerals 50.",
                    "qas": [
                        {
                            "question": "Where did Super Bowl 50 take place?",
                            "is_impossible": "false",
                            "id": "56be4db0acb8001400a502ee",
                            "answers": [
                                {
                                    "answer_start": "403",
                                    "text": "Santa Clara, California"
                                }
                            ]
                        },
                        {
                            "question": "What was the winning score of the Super Bowl 50?",
                            "is_impossible": "true",
                            "id": "56be4db0acb8001400a502ez",
                            "answers": [
                            ]
                        }
                    ]
                }
            ]
        }
    ]
}
...
The evaluation files (for validation and testing) follow the above format except for it can provide more than one answer to the same question. The inference file follows the above format except for it does not require the "answers" and "is_impossible" keywords.
BERT Model for QA
In this notebook, we will show how to use a pre-trained BERT (Bidirectional Encoder Representations from Transformers) model for QA leveraging TAO. The BERT model has made major breakthroughs in Natural Language Understanding in recent years. For most applications, the model is typically trained in two phases, pre-training and fine-tuning.
- The BERT core model can be pre-trained on large, generic datasets to generate dense vector representations of input sentence(s).
- It can be quickly fine-tuned to perform a wide variety of tasks such as question/answering, sentiment analysis, or named entity recognition.
The figure below shows a high-level block diagram of pre-training and fine-tuning BERT for QA.

In alignment with the above, for pre-training we can take one of two approaches. We can either pre-train the BERT model with our own data, or use a model pre-trained by Nvidia. After we obtain a pre-trained model, the next step would be to fine-tune it for the QA task and run inference on the fine-tuned model.

Preparing the dataset
The SQuAD dataset is available here. You will find that there are 2 versions of the Squad datasets: v1.1 and v2.0.
- SQuAD 1.1, the older version of the SQuAD dataset, contains 100,000+ question-answer pairs on 500+ articles.
- SQuAD 2.0 dataset combines the 100,000 questions in SQuAD 1.1 with over 50,000 unanswerable questions written adversarially by crowdworkers to look similar to answerable ones.
Downloading the dataset
For convenience, you may use the code below to download the dataset
TAO workflow
The rest of the notebook shows what a sample TAO workflow looks like.
Setting TAO Mounts
Now that our dataset has been downloaded, an important step in using TAO is to set up the directory mounts. The TAO launcher uses docker containers under the hood, and for our data and results directory to be visible to the docker, they need to be mapped. The launcher can be configured using the config file ~/.tao_mounts.json. Apart from the mounts, you can also configure additional options like the Environment Variables and amount of Shared Memory available to the TAO launcher.
IMPORTANT NOTE: The code below creates a sample ~/.tao_mounts.json file. Here, we can map directories in which we save the data, specs, results and cache. You should configure it for your specific case such your these directories are correctly visible to the docker container. Please also ensure that the source directories exist on your machine!
The rest of the notebook exemplifies the simplicity of the TAO workflow. Users with basic knowledge of Deep Learning can get started building their own custom models using a simple specification file. It's essentially just one command each to run data preprocessing, training, fine-tuning, evaluation, inference, and export! All configurations happen through YAML spec files
Configuration/Specification Files
The essence of all commands in TAO lies in the YAML spec files. There are sample spec files already available for you to use directly or as reference to create your own. Through these spec files, you can tune many knobs like the model, dataset, hyperparameters, optimizer etc. Each command (like train, finetune, evaluate etc.) should have a dedicated spec file with configurations pertinent to it.
Here is an example of the training spec file:
trainer:
  max_epochs: 100

model:
  tokenizer:
      tokenizer_name: ${model.language_model.pretrained_model_name} # or sentencepiece
      vocab_file: null # path to vocab file
      tokenizer_model: null # only used if tokenizer is sentencepiece
      special_tokens: null

  language_model:
    pretrained_model_name: bert-base-uncased
    lm_checkpoint: null
    config_file: null # json file, precedence over config
    config: null

  token_classifier:
    num_layers: 1
    dropout: 0.0
    num_classes: 2
    activation: relu
    log_softmax: false
    use_transformer_init: true


training_ds:
  file: ??? # e.g. squad/v1.1/train-v2.0.json
  batch_size: 12 # per GPU

...
Data Convert
For the QA task, the commands in TAO accepts data in the SQuAD JSON format (refer Preparing the dataset section above). If you have your data in any other format, be sure to convert it in the SQuAD format. Since we are using the SQuAD dataset for this notebook, we don't need to convert the data into any other format. We can proceed with training/fine-tuning directly.
Set Relevant Paths
Set these paths according to your environment.
Downloading Specs
We can proceed to downloading the spec files. The user may choose to modify/rewrite these specs, or even individually override them through the launcher. You can download the default spec files by using the download_specs command.
The -o argument indicating the folder where the default specification files will be downloaded, and -r that instructs the script where to save the logs. Make sure the -o points to an empty folder!
Training a model using TAO is as simple as configuring your spec file and running the train command. The code cell below uses the default train.yaml available for users as reference. It is configured by default to use the bert-base-uncased pretrained model. Additionally, these configurations could easily be overridden using the tao-launcher CLI as shown below. For instance, below we override the training_ds.file, validation_ds.file, trainer.max_epochs, training_ds.num_workers and validation_ds.num_workers configurations to suit our needs. We encourage you to take a look at the .yaml spec files we provide!
For training a QA model in TAO, we use the tao question_answering train command with the following args:
-e: Path to the spec file-g: Number of GPUs to use-k: User specified encryption key to use while saving/loading the model-r: Path to a folder where the outputs should be written. Make sure this is mapped in tlt_mounts.json- Any overrides to the spec file eg. trainer.max_epochs
More details about these arguments are present in the TAO Getting Started Guide
NOTE: All file paths corresponds to the destination mounted directory that is visible in the TAO docker container used in backend.
Also worth noting is that the first time you run training on the dataset, it will run pre-processing and save that processed data in the same directory as the dataset.
The train command produces a .tlt file called trained-model.tlt saved at $RESULTS_DIR/train/checkpoints/trained-model.tlt. This file can be fed directly into the fine-tuning stage as we see in the next block.
Other tips and tricks:
- To accelerate the training without loss of quality, it is possible to train with these parameters:
trainer.amp_level="O1"andtrainer.precision=16for reduced precision. - The batch size (
training_ds.batch_size) may influence the validation accuracy. Larger batch sizes are faster to train with, however, you may get slightly better results with smaller batches. - You can use the parameter:
trainer.val_check_intervalto define how many times per epoch to see validation accuracy metric calculated and printed. For instance, usingtrainer.val_check_interval=0.25will show the metric 4 times per epoch.
Fine-Tuning
Like many other NLP tasks, since we begin with a pretrained BERT model the step shown above for (re)training with your custom data should do the trick. However, TAO does provide a command for fine-tuning if your use-case demands that. Instead of tao question_answering train, we use tao question_answering finetune instead. We also specify the spec file corresponding to fine-tuning. All commands in TAO follow a similar pattern, streamlining the workflow even further!
Note: If you wish to proceed with a trained dataset for better inference results, you can find a .nemo model here.
Simply re-name the .nemo file to .tlt and pass it through the finetune pipeline.
This command will generate a fine-tuned model finetuned-model.tlt at $RESULTS_DIR/finetune/checkpoints
Evaluation
The evaluation spec .yaml is as simple as:
test_ds:
  file: ??? # e.g. squad/v1.1/dev-v1.1.json
  batch_size: 32
  shuffle: false
  num_samples: 500
Below, we use tao question_answering evaluate and override the test data configuration by specifying test_ds.file. Other arguments follow the same pattern as before!
The output of Evaluation should give the exact match/f1 scores for each data point. Remember that we had trained for just 1 epoch since this is a demonstration!
Inference
Inference using a .tlt trained or fine-tuned model uses the tao question_answering infer command.
The infer.yaml is also very uncomplicated:
# Name of  file containing data used as inputs during the inference.
infer_ds:
    file: ???  # e.g. squad/v1.1/dev-v1.1.json
We use the SQuAD 2.0 evaluation file for the sake of demonstration, you can also try out your own custom inputs as an exercise!
The results of inference are saved at $RESULTS_DIR/infer/prediction.txt in the format:
{
    <question_id>: <answer>,
    ...
}
A file with n-best results for each question is also saved at $RESULTS_DIR/infer/nbest.txt in the format:
{
    <question_id>: [
        {
            "text": <answer-1>,
            "probability": 0.9576789114427999,
            "start_logit": 7.168248653411865,
            "end_logit": 6.93817138671875
        },
        {
            "text": <answer-2>,
            "probability": 0.02714239211951417,
            "start_logit": 7.168248653411865,
            "end_logit": 3.374755620956421
        },
    ...
ONNX is a popular open format for machine learning models. It enables interoperability between different frameworks, easing the path to production.
TAO provides commands to export the .tlt model to the ONNX format in an .eonnx archive. The export_format configuration can be set to ONNX to achieve this.
Sample usage of the tao question_answering export command is shown in the following code cell. The export.yaml file we use looks like:
# Name of the .tlt EFF archive to be loaded/model to be exported.
restore_from: trained-model.tlt

# Set export format: ONNX | RIVA
export_format: RIVA

# Output EFF archive containing ONNX.
export_to: exported-model.eonnx
This command exports the model as exported-model.eonnx which is essentially an archive containing the .onnx model.
Inference using ONNX
TAO provides the capability to use the exported .eonnx model for inference. The command tao question_answering infer_onnx is very similar to the inference command for .tlt models. Again, the input file used are just for demo purposes, you may choose to try out their custom input!
The output of this infer_onnx is similar to that of the infer command before. A prediction.txt and a nbest.txt file is generated. You can configure the exact name/location of these results files in the spec yaml.
With TAO, you can also export your model in a format that can deployed using Nvidia Riva, a highly performant application framework for multi-modal conversational AI services using GPUs! The same command for exporting to ONNX can be used here. The only small variation is the configuration for export_format in the spec file!
The model is exported as qa-model.riva which is in a format suited for deployment in Riva.
What's Next?
You could use TAO to build custom models for your own applications, or you could deploy the custom model to Nvidia Riva!